
Brick Stitch Embroidery Basics
Bold colors and vivid geometric patterns. These are the primary characteristics of many pieces of decorative embroidery that survive from 13th-14th century Lower Saxony near Hildesheim (modern Germany). Their offset counted stitches produce a brick-like appearance giving the style the modern name of “German Brick Stitch Embroidery.”
{ Skip to Materials – Technique – Patterns – FAQ – Extant Works – References }

Embroidered Hanging. Late 14th century. Metropolitan Museum of Art. #69.106.
Brick stitch embroidery was used on religious hangings and vestments depicting the life of Christ, martyrdom of saints, or other images intended to provoke reflection and devotion. In these applications, the geometric patterns were used to fill regions of the embroidered scenes: a saint’s tunic, a bedspread, an altar.

Embroidered Hanging (detail – Three Wise Men). Metropolitan Museum of Art. #69.106.
The same stitch techniques and patterns were also used to decorate pouches. Rather than depicting an embroidered scene, the pouches were completely covered with a geometric design. The pouches may have been used to house holy relics, or they may have contained pocket change.
-

- Bag. © Victoria and Albert Museum, London. #8313-1863.

-

- Bag. © Victoria and Albert Museum, London. 8699-1863.

One theory is that this style of embroidery was common in Lower Saxony because it was easier to learn and required less expensive materials than other contemporary styles. Brick stitch relied on colorful silk threads, but it did not require the precious metal threads or lush velvet ground fabrics found in opus anglicanum, a contemporary embroidery style from England. Brick stitch embroidery could be quickly taught to young women entering nunneries, allowing them to create large colorful church decorations locally and inexpensively as part of their devotions.
Materials
 Historically, brick stitch embroidery was stitched in silk thread on an evenweave linen ground fabric. Unfortunately, silk embroidery floss and linen evenweave fabric can be difficult to find and expensive in our modern world. I suggest substituting more affordable and readily available materials to start with: DMC cotton embroidery floss and cotton evenweave fabric. Both of these can be found at independent embroidery stores and large chain craft stores like Michaels or Joann. The ground fabric of the extant pouch pictured above (#8699-1863) has 28 threads per inch, a thread count readily available in cotton evenweave fabric.
I recommend a somewhat blunt needle so that it’s easier to go between the threads of the ground fabric rather than piercing through them. A #24 tapestry needle is what I typically use with the cotton embroidery floss and evenweave fabric above.
An embroidery hoop or frame is optional. While not historically accurate, I often use a scrolling frame since it gives me something other than the ground fabric to hold on to. A scrolling frame doesn’t squish your embroidery like a small hoop can but is still relatively compact.

Technique
The one stitch type that is found in all brick stitch pieces is “offset counted satin stitch”. What does that mean? These are stitches which are made in the direction of the weave over a specific number of threads specified by the pattern. The stitches are butted up against their neighbors so that they cover the ground fabric. The beginning of each stitch is offset from its immediate neighbors to create the brick effect.
The stitches are made over two, four, or six threads. Four threads is the most common stitch length, but some designs require two- and six-thread stitches to form the points of diamonds or join diagonal lines. No matter how long the stitches are, each stitch is offset from its neighbor to produce the brick-like appearance.
Below are examples of the “Eights” pattern (redacted below). These examples were done in yarn on plastic canvas to make the stitches a bit easier to see (click on the images for a larger version).
Each stitch in this pattern is length 4: come up through the starting hole, move vertically over 4 threads, and go back through. The ending hole for each stitch is in the same column as that stitch’s starting hole, it’s just a different row.
The starting hole for the next stitch is over one column horizontally and two rows vertically. Now, go up through the new starting hole, move vertically across 4 threads, and go back through. You should have two vertical stitches of the same length, one offset from the other. This is the process you will repeat over and over again until the pattern is complete.
-

- Front side of motif. Each stitch is vertical, goes over 4 “threads”, and is offset by 2 from its neighbors.

-

- Back side of motif.

Because each stitch is offset from its neighbors, your stitching will follow diagonal segments in the pattern rather than a horizontal or vertical line. When you reach the end of a motif, count to find the next spot nearby that your working color is needed, and jump there to start your next stitch. This will leave a short floating thread on the back of your work, but that’s fine.
-

- Front of motif with inner spots.

-

- Back Back side of an example where the end in the center bottom is tucked into the last few stitches.

Remember: the end of one stitch and the start of another stitch will go through the same hole in the fabric. The stitches should share the hole; one stitch should not pierce through the other. Because the holes are shared, stitching the second color in a region is easier. The previous stitches show you where the starting and ending holes for the new stitches will be.
-

- Front of motif with second color.
-

- Back of motif with second color.
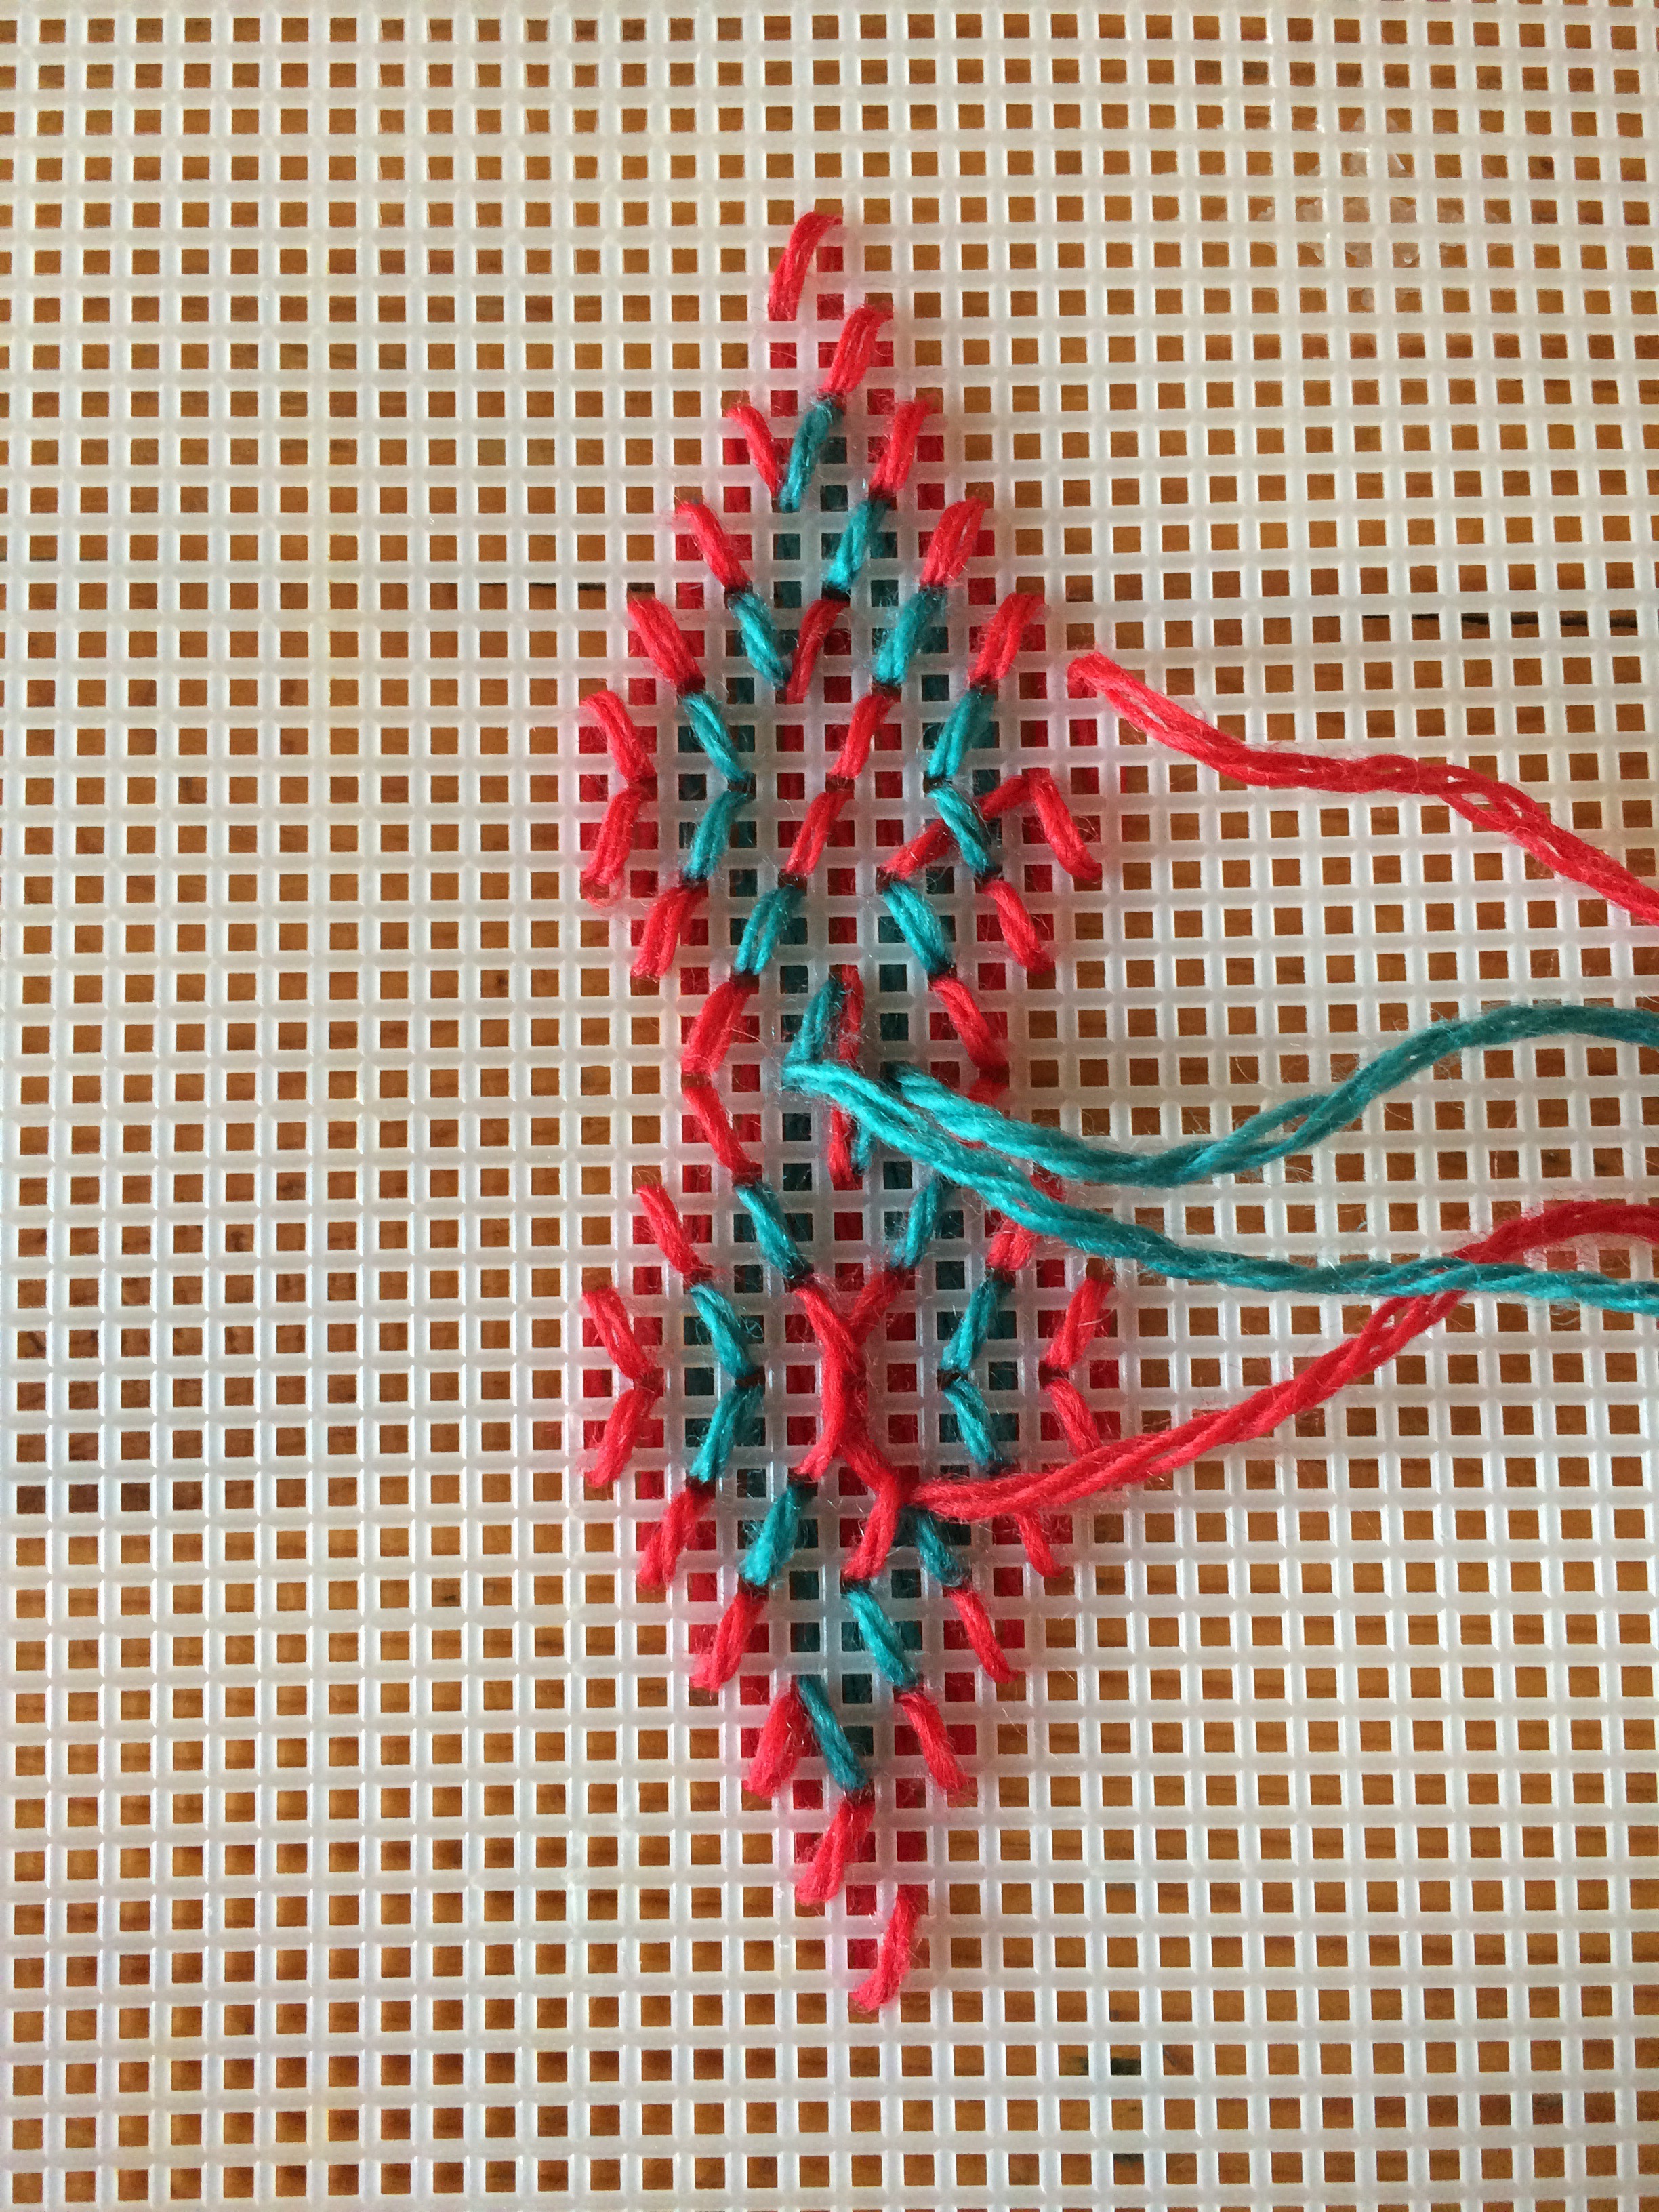
When you are finished with an area, your stitches should completely cover the ground fabric on the front side. The yarn in the examples above is a bit too thin – you can still see the plastic “fabric” between the columns of stitches from the front side.
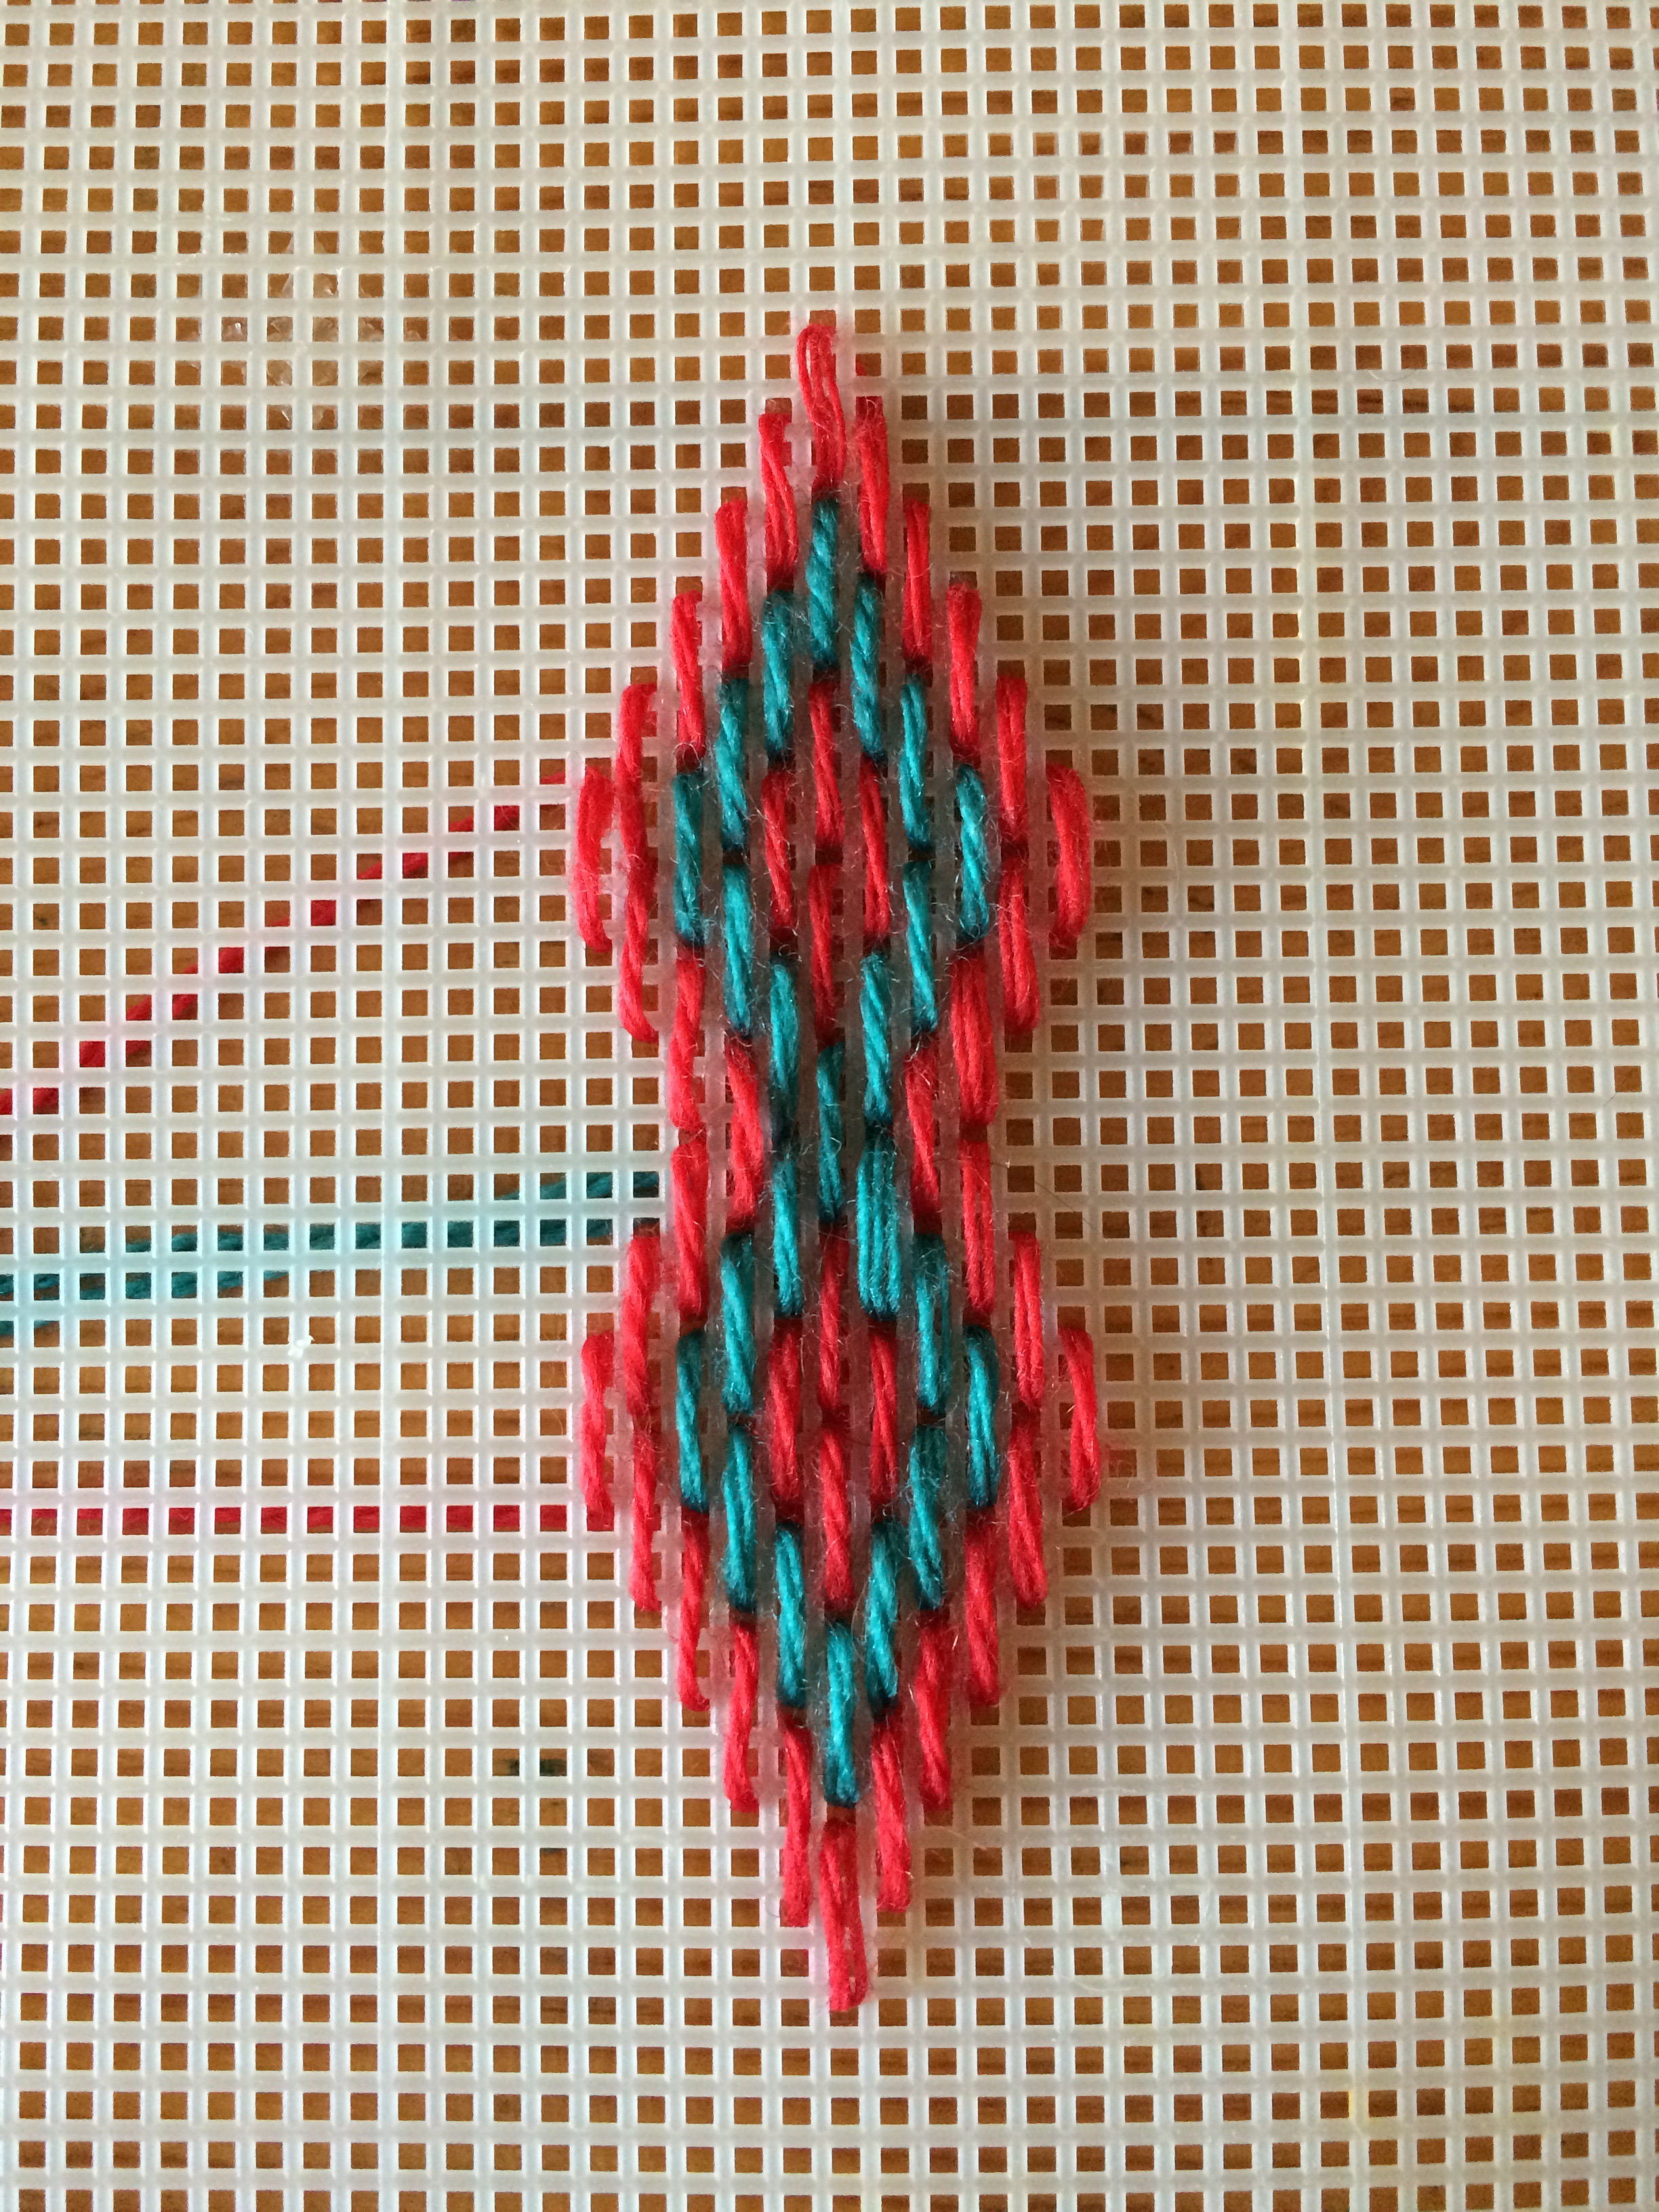
Working with patterns that have stitches of length 2, 4, and 6 is similar. Instead of always crossing 4 threads vertically, you cross the number (2, 4, or 6) indicated by the pattern. Also, the start of a new stitch is only offset 1 from the last stitch. Because the offset is smaller, the back side will consume more thread. Below are examples of the “Nested Diamonds” pattern.
-

- Front of motif, bottom portion of diamonds only.

-

- Back of motif, bottom portion of diamonds only.
-

- Front of motif, top of diamonds filled in.

-

- Back of motif, top of diamonds filled in.

How to Read the Patterns
In the patterns below, each oval represents one stitch. The ovals are aligned to an invisible grid which represents the threads in the fabric. When looking at a pattern, first check to see if all of the ovals are the same length.
If they’re all the same length, then each of those ovals represents a stitch of length 4. The ends of the stitches should be offset by 2 threads, aligning the middle of one column of stitches with the ends of the next row.
If the ovals are differing lengths, then the short ones represent a stitch of length 2, the medium ones are length 4, and the long ones are length 6. The end of these stitches if offset by only one thread. Since everything in these patterns is symmetrical, this allows a medium-length stitch (4) to shorten on each end (now length 2) or grow on each end (now length 6) while being centered along the same line.
Each of the patterns can be broken into one or more motifs that’s repeated over and over again, both horizontally and vertically. Most of the images below show several repeats of that base motif, to provide an idea of what the pattern looks like and to indicate how the repeats line up.
Redacted Patterns
Click on any of the patterns below for a larger version of that image.
-

- “Diamonds” pattern from Metropolitan Museum #69.106.
-

- “Eights” pattern from Victoria & Albert Museum #17-1873.

-

- “ZigZags” pattern from Victoria & Albert Museum #17-1873.

-

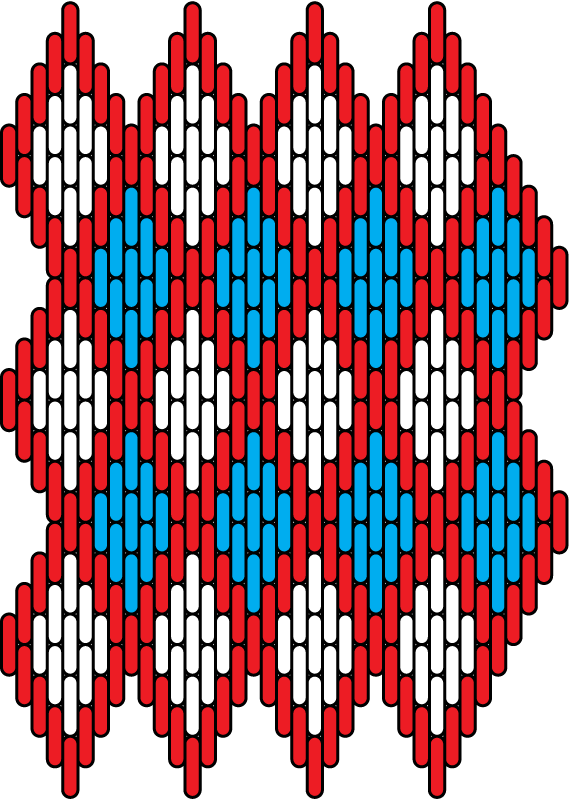
- “Nested Diamonds” pattern from Metropolitan Museum of Art #69.106.

-

- “Crosses” pattern from Art Institute of Chicago. #1907.765.

-

- “Threes” pattern from Cathedral Museum Hildesheim #L-2012-13.

-

- “Xs and Dots” pattern from Metropolitan Museum of Art #69.106.

-

- “Frets and Hashes” pattern from Victoria & Albert Museum #8699-1863.

-

- “Pincers” pattern from Metropolitan Museum of Art #69.106.

Additional patterns can be found at A Stitch Out of Time and Medieval Arts & Crafts.
Frequently Asked Questions
How many strands of floss? The goal is to have identifiable stitches that cover the ground fabric. This means that the thread you’re using needs to be big enough to cover but not so big that the stitches all blend together. DMC cotton embroidery floss can be split into six strands. If you’re using that on 28 count evenweave, I recommend using three to six strands of the embroidery floss (i.e. at least half of the piece of floss) to provide sufficient coverage for this ground fabric.
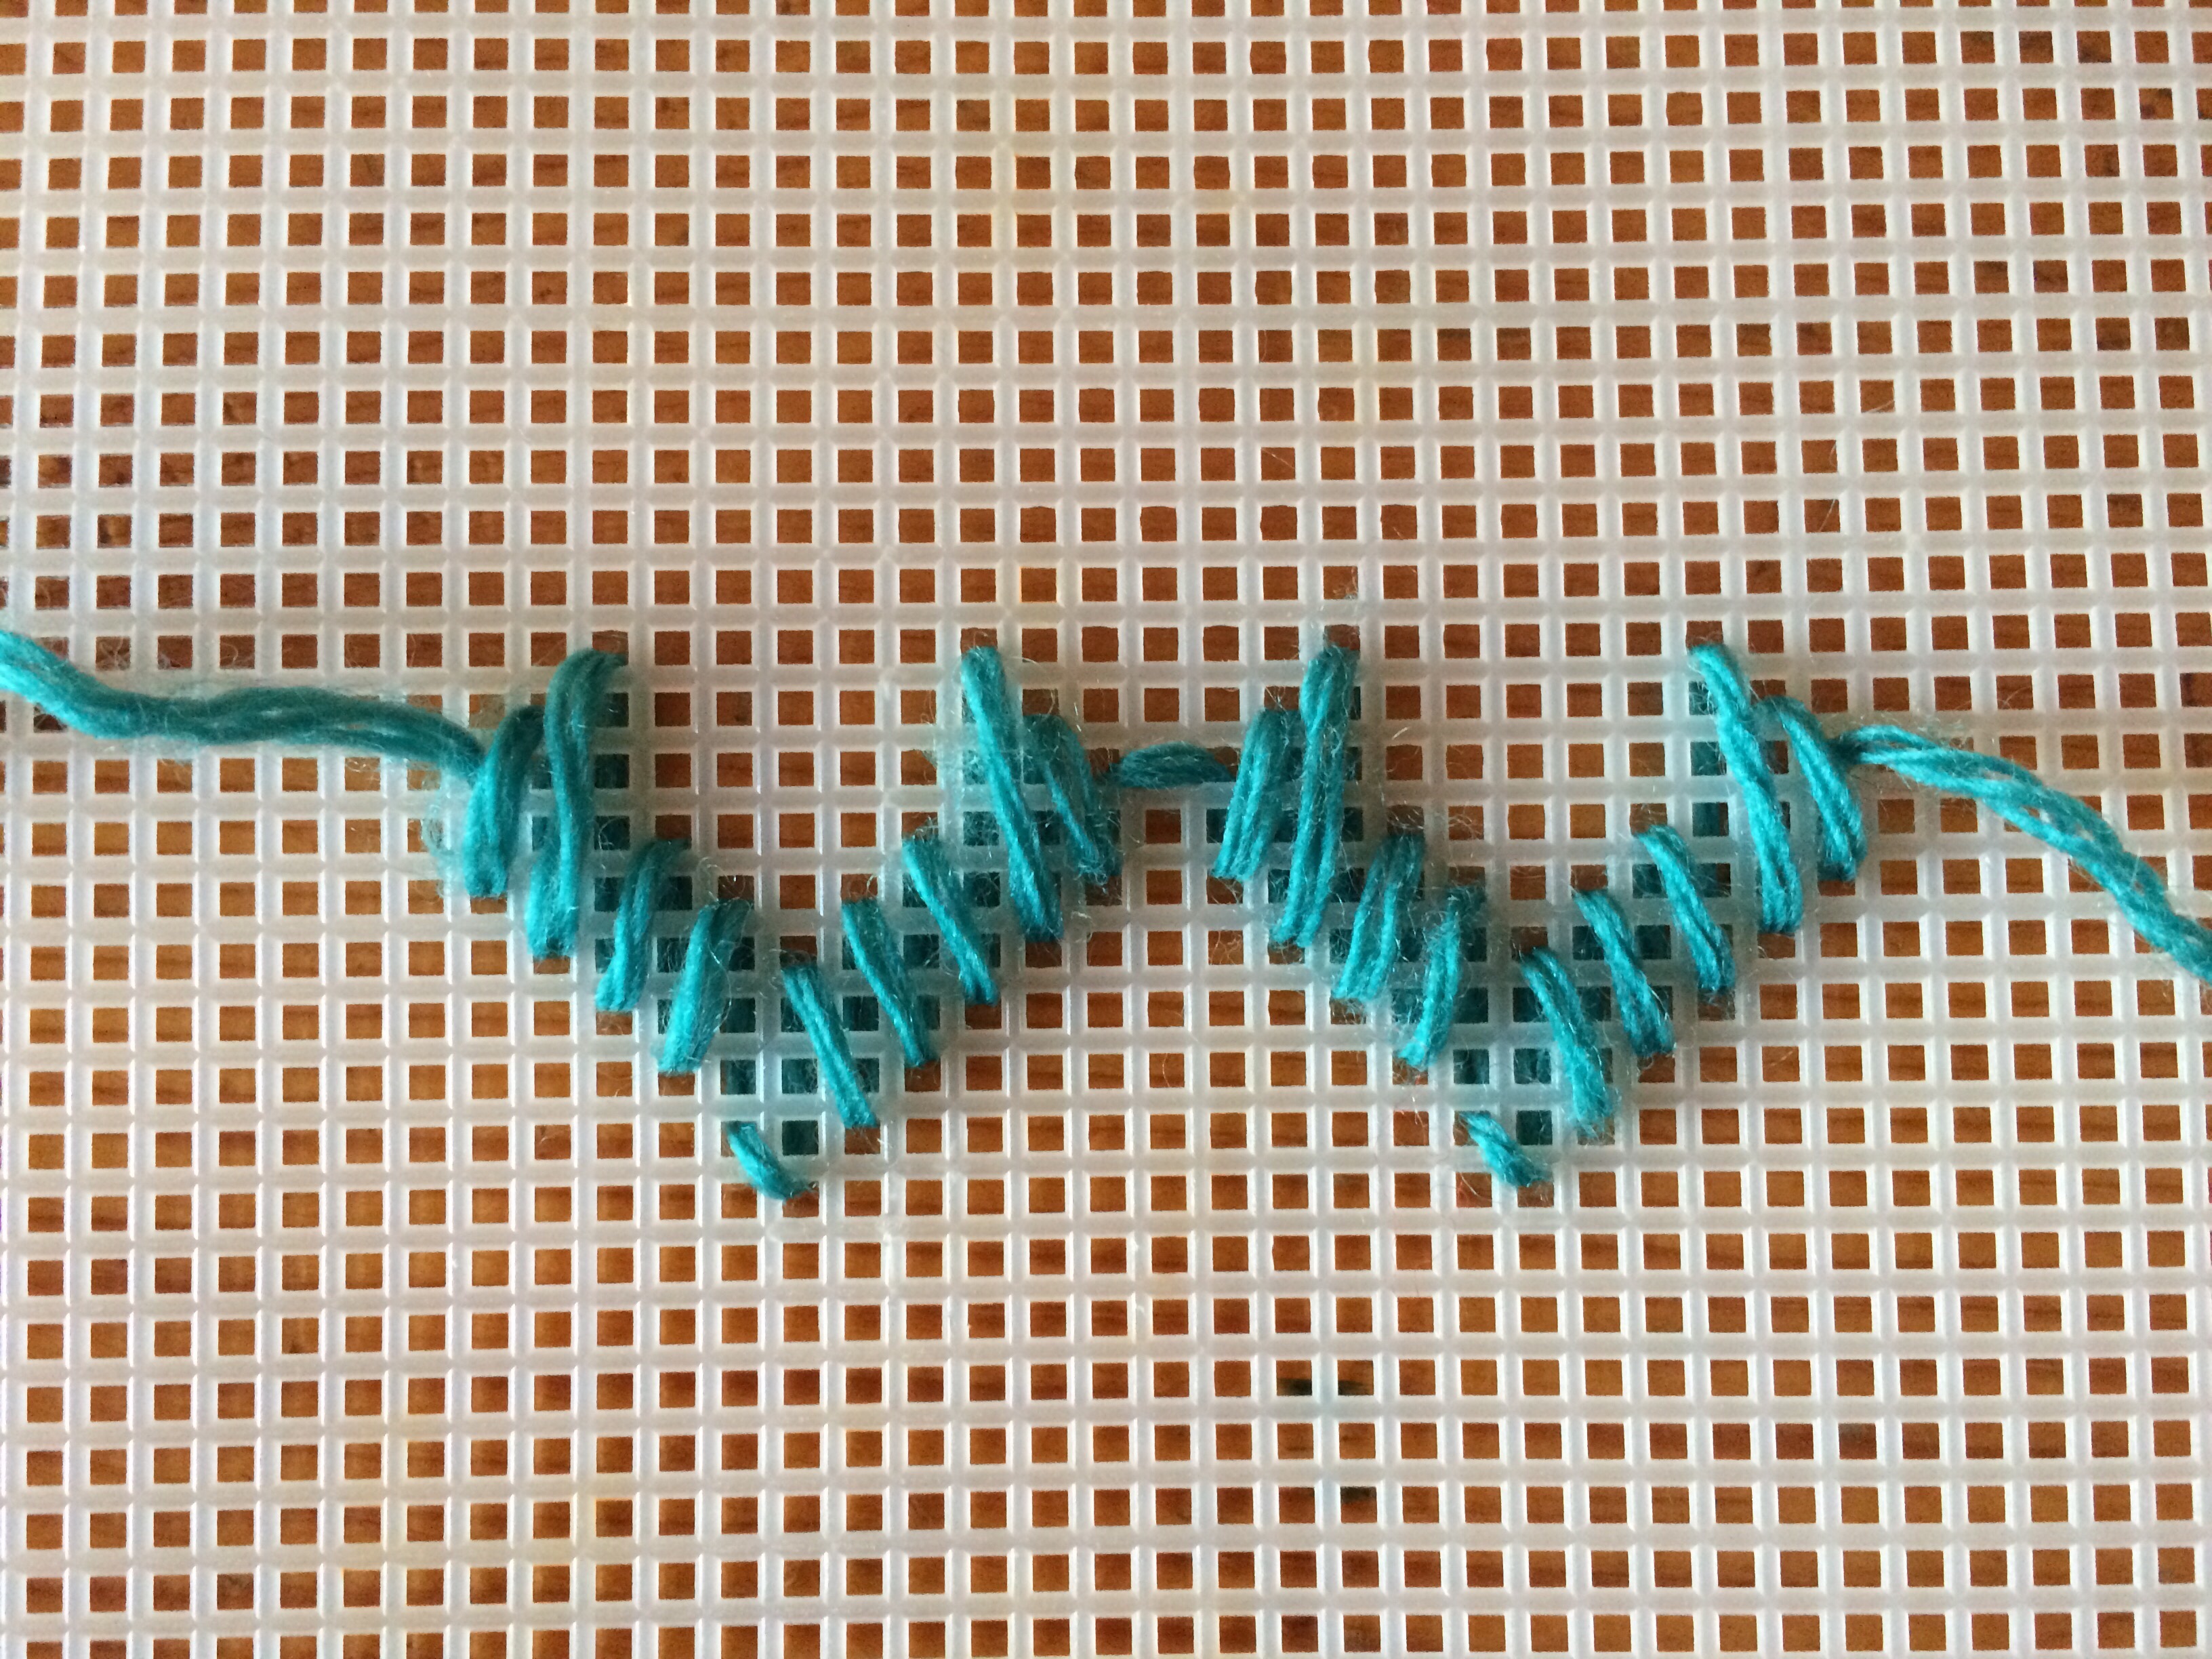
How do you start a new thread? Do not tie a knot. Leave a 1-2 inch long tail on the back side of the fabric after your first stitch with the new thread. Then, hold that tail along the back of your work so that the next few stitches you make loop over it, securing it in place.
How do you finish a thread? End your stitch on the back side of your work. Pass the thread under the back side of several neighboring stitches to secure it, leaving a short tail. Do not tie a knot.
-
- Back Back side of an example where the end in the center bottom is tucked into the last few stitches.
-

- Back side with starting and ending threads tacked down by other stitches. It will be lined, so this will be invisible when the piece is done.
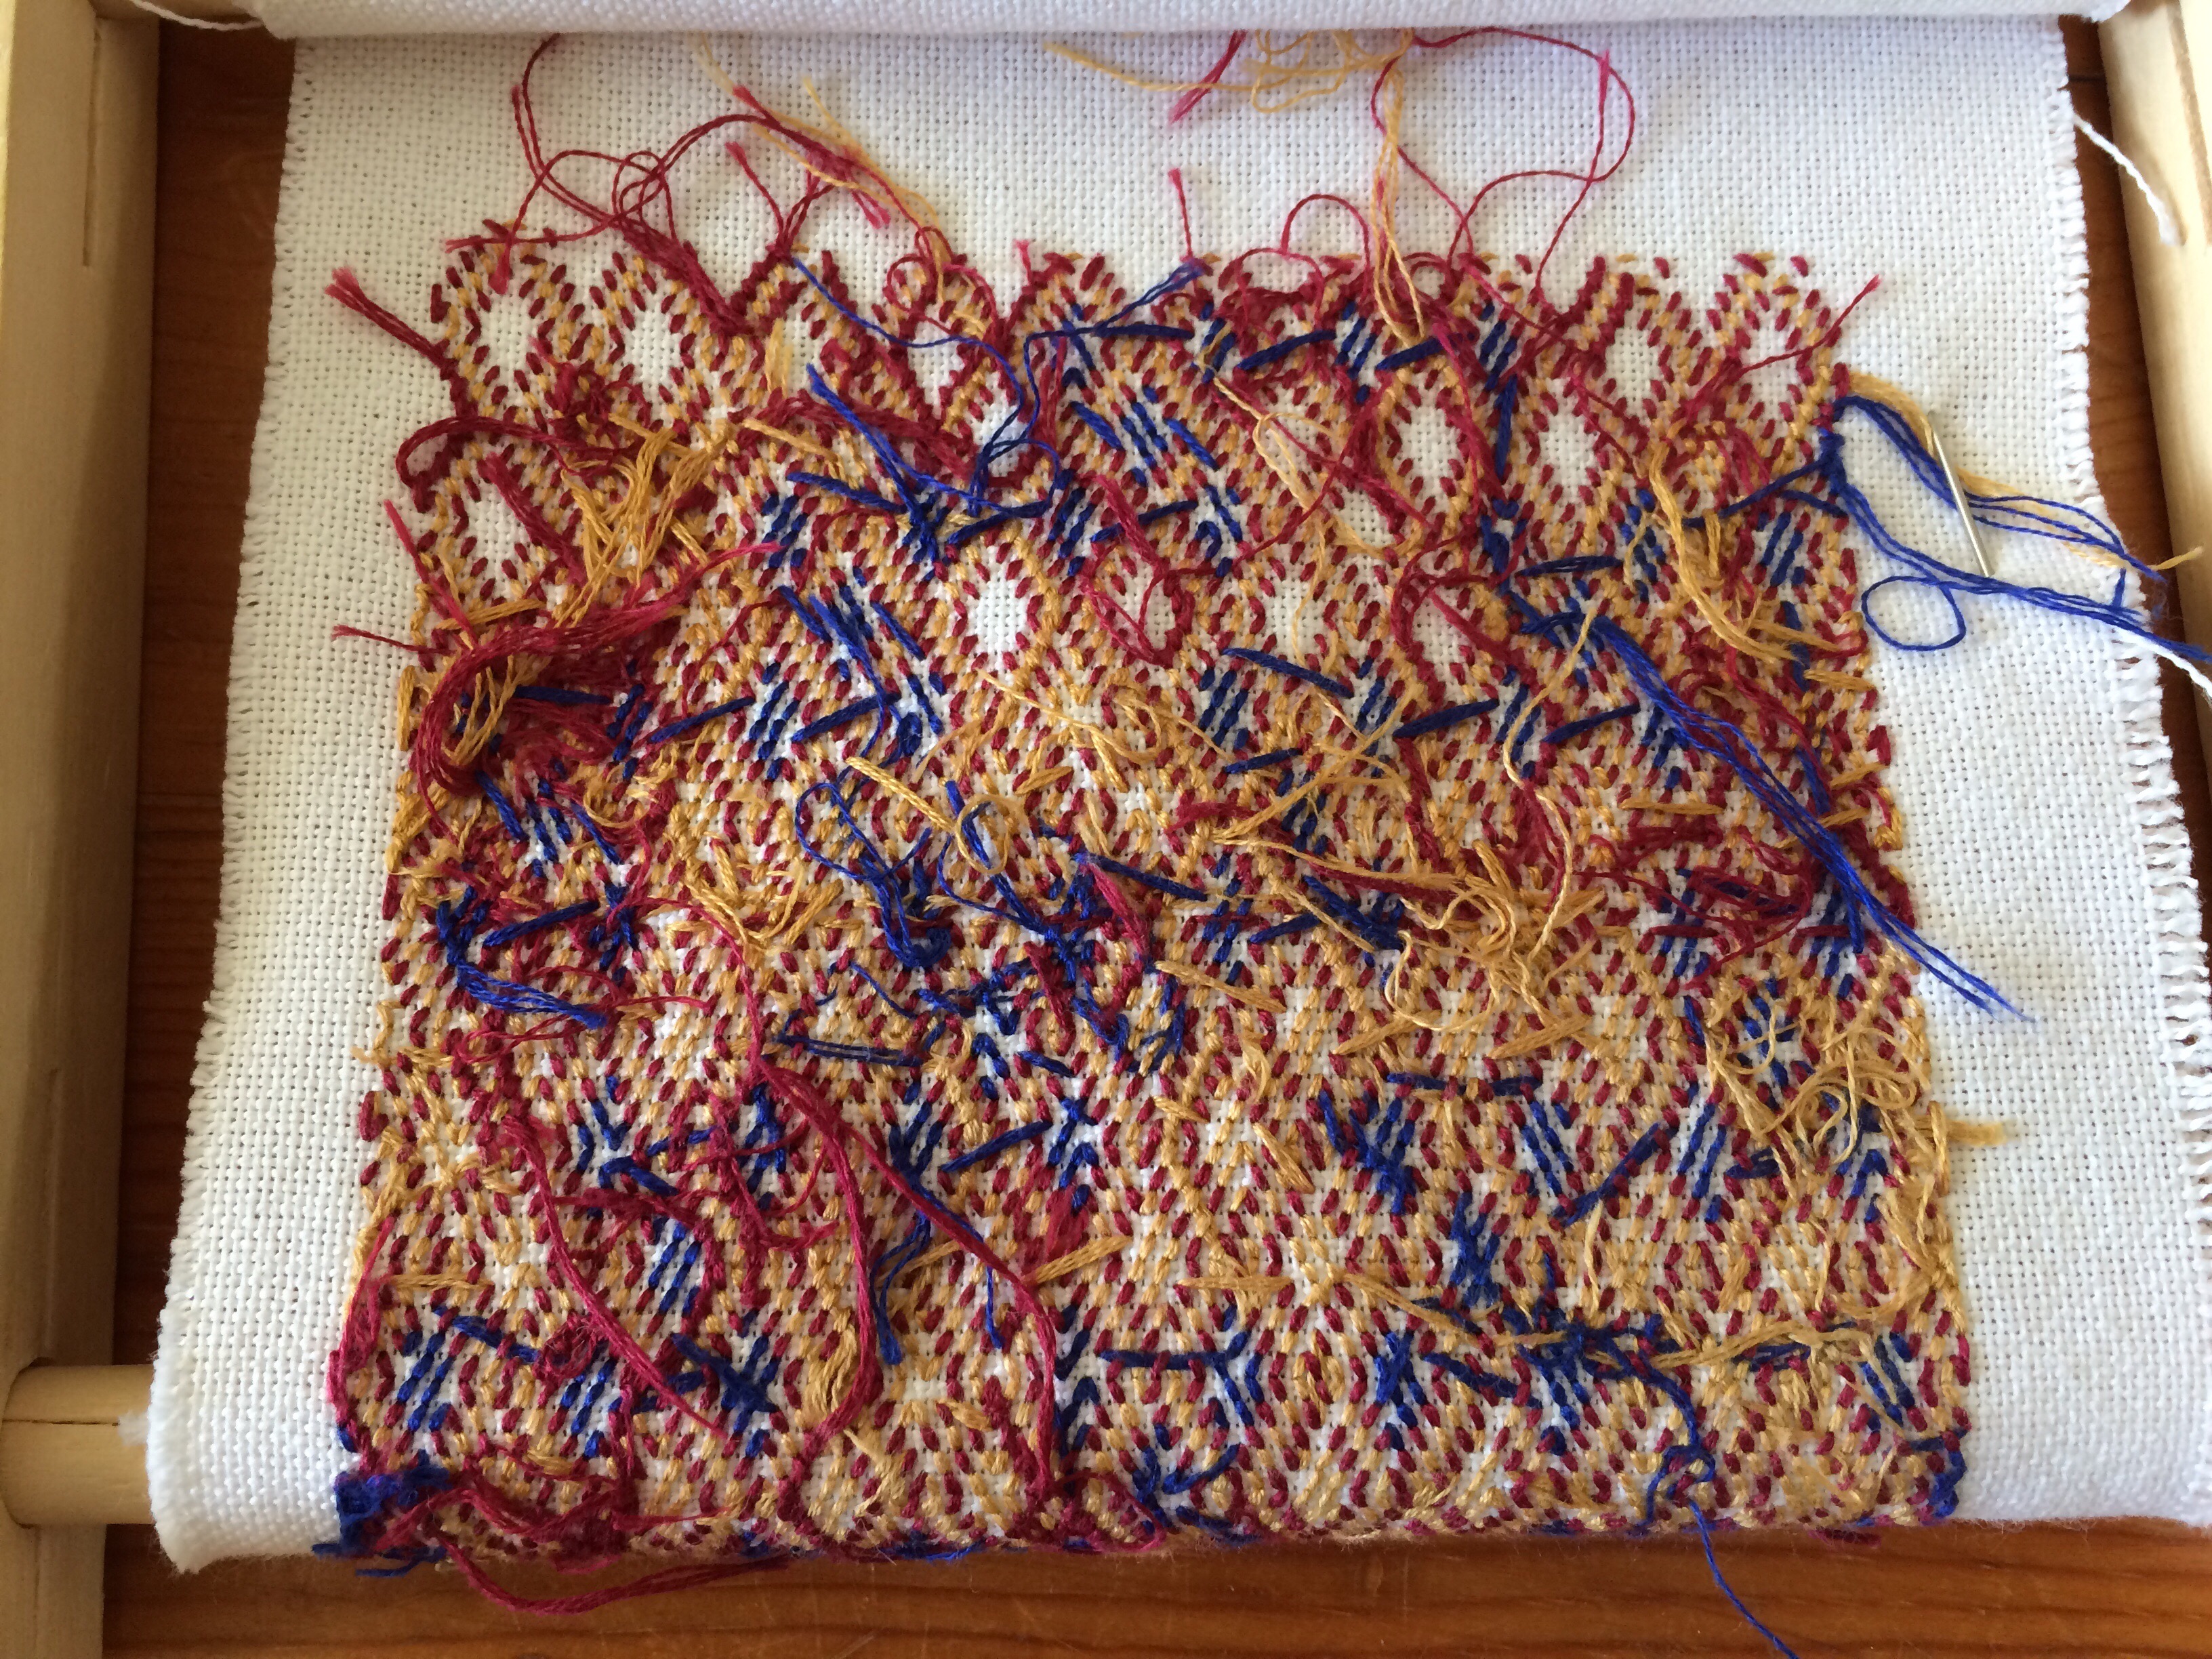
When do you switch colors? I prefer to stitch a region in a framing color (something with strongly connected diagonals) before switching to the fill colors. I have to count carefully when stitching the first color. Since that first color acts as a framework for the following colors, the counts for later colors are double-checks and require less focus. Below is an example where I started with the red, then filled in the other colors.

In this piece, I started with the red frame stitches then filled in the white, purple, yellow, and remaining red.
How do I make the edges square? Because of the offset stitches, the redacted patterns all have jagged, diagonal edges. The top and bottom of a piece are the one place where the rules about stitch length are not followed so that the edge will be horizontal. Pick a place in the pattern repeat where you want to have your top or bottom edge. If the pattern indicates that the stitch would go past that edge, stop it at the edge instead. This will lead to stitches that are shorter than normal in the pattern, sometimes only crossing over one thread. It can be helpful to take a printout of your pattern and carefully fold it along the line where you want the edge. Don’t forget to leave at least 1/2″ around all edges of your embroidery for seam allowance.

An example of the “Nested Diamonds” pattern where the top edge is the middle of the diamond.
How do I turn a piece of embroidery into a finished bag? Full details will have to wait for another post, so here’s a high level overview of one method for making a bag:
- If your bag is embroidered on both sides, fold your embroidery in half and slip stitch the sides together, leaving an opening at the top of the bag. If your bag is embroidered on one side, sew your embroidery to the piece of fabric that will be the back of your bag.
- (optional) Attach a long cord for a hanging loop. I anchor this to the inside of the pouch before attaching the lining and then sew the lining around it.
- Make a lining the same size as the outside of your bag, and slip stitch it to the outside of the bag at the top opening. This lining will protect (and hide) the back side of your stitches.
- Hand-sew eyelets for the drawstring. I typically make them through the outer layer and lining,
but you can do them through the outer layer only. In that case, make the eyelets before attaching your lining. - Create a drawstring using a cord-making technique such as finger-loop braiding, lucet, or kumihimo and thread it through the eyelets.
- (optional) Add tassels on the bottom corners to reduce wear on those spots.
-

- Lining and eyelets.

-

- Eyelets and drawstring.

-

- Finished pouch with drawstring and separate hanging loop.
A Few Extant Works
- Part of an Antependium (Depicting The Last Supper). Art Institute of Chicago. #1907.765.
- Embroidered Hanging. Metropolitan Museum of Art. #69.106.
- Reliquienbeutel. Museum Schnütgen. #P 870. (hi-res image only)
- Bag. Victoria and Albert Museum. #8313-1863.
- Bag. Victoria and Albert Museum. #8699-1863.
- Bag. Victoria and Albert Museum. #1567-1902.
- The Hildesheim Cope. Victoria and Albert Museum. #17-1873.
References
- Bassée, Nicolas, and Kathleen Epstein. German Renaissance Patterns for Embroidery: A Facsimile Copy of Nicolas Bassée’s New Modelbuch. Austin [Texas]: Curious Works Press. 1994.
- Brandt, Michael, Claudia Hohl, and Gerhard Lutz. Cathedral Museum Hildesheim. Regensburg: Schnell + Steiner, 2015.
- Fernández Álvarez, Mercè. “Reliquary bags, purses, and pouches.” Datatèxtil, no 30 (2014): 23-29.
- Kroos, Renate. Niedersächsische Bildstickereien Des Mittelalters. Berlin: Deutscher Verlag für Kunstwissenschaften, 1970.
- Mayer, Christa C. “An Early German Needlework Fragment.” Art Institute of Chicago Museum Studies 6 (1971): 67-76.
- Mitchell, Timothy. “A Stitch Out of Time: 14th and 15th Century German Counted Thread Embroidery.” The Compleat Anachronist, no. 86 (1996). (Also available online at http://wymarc.com/asoot/asoot.php)
- Young, Bonnie. “Needlework by Nuns: A Medieval Religious Embroidery.” The Metropolitan Museum of Art Bulletin 28, no. 6 (1970): 263-77.
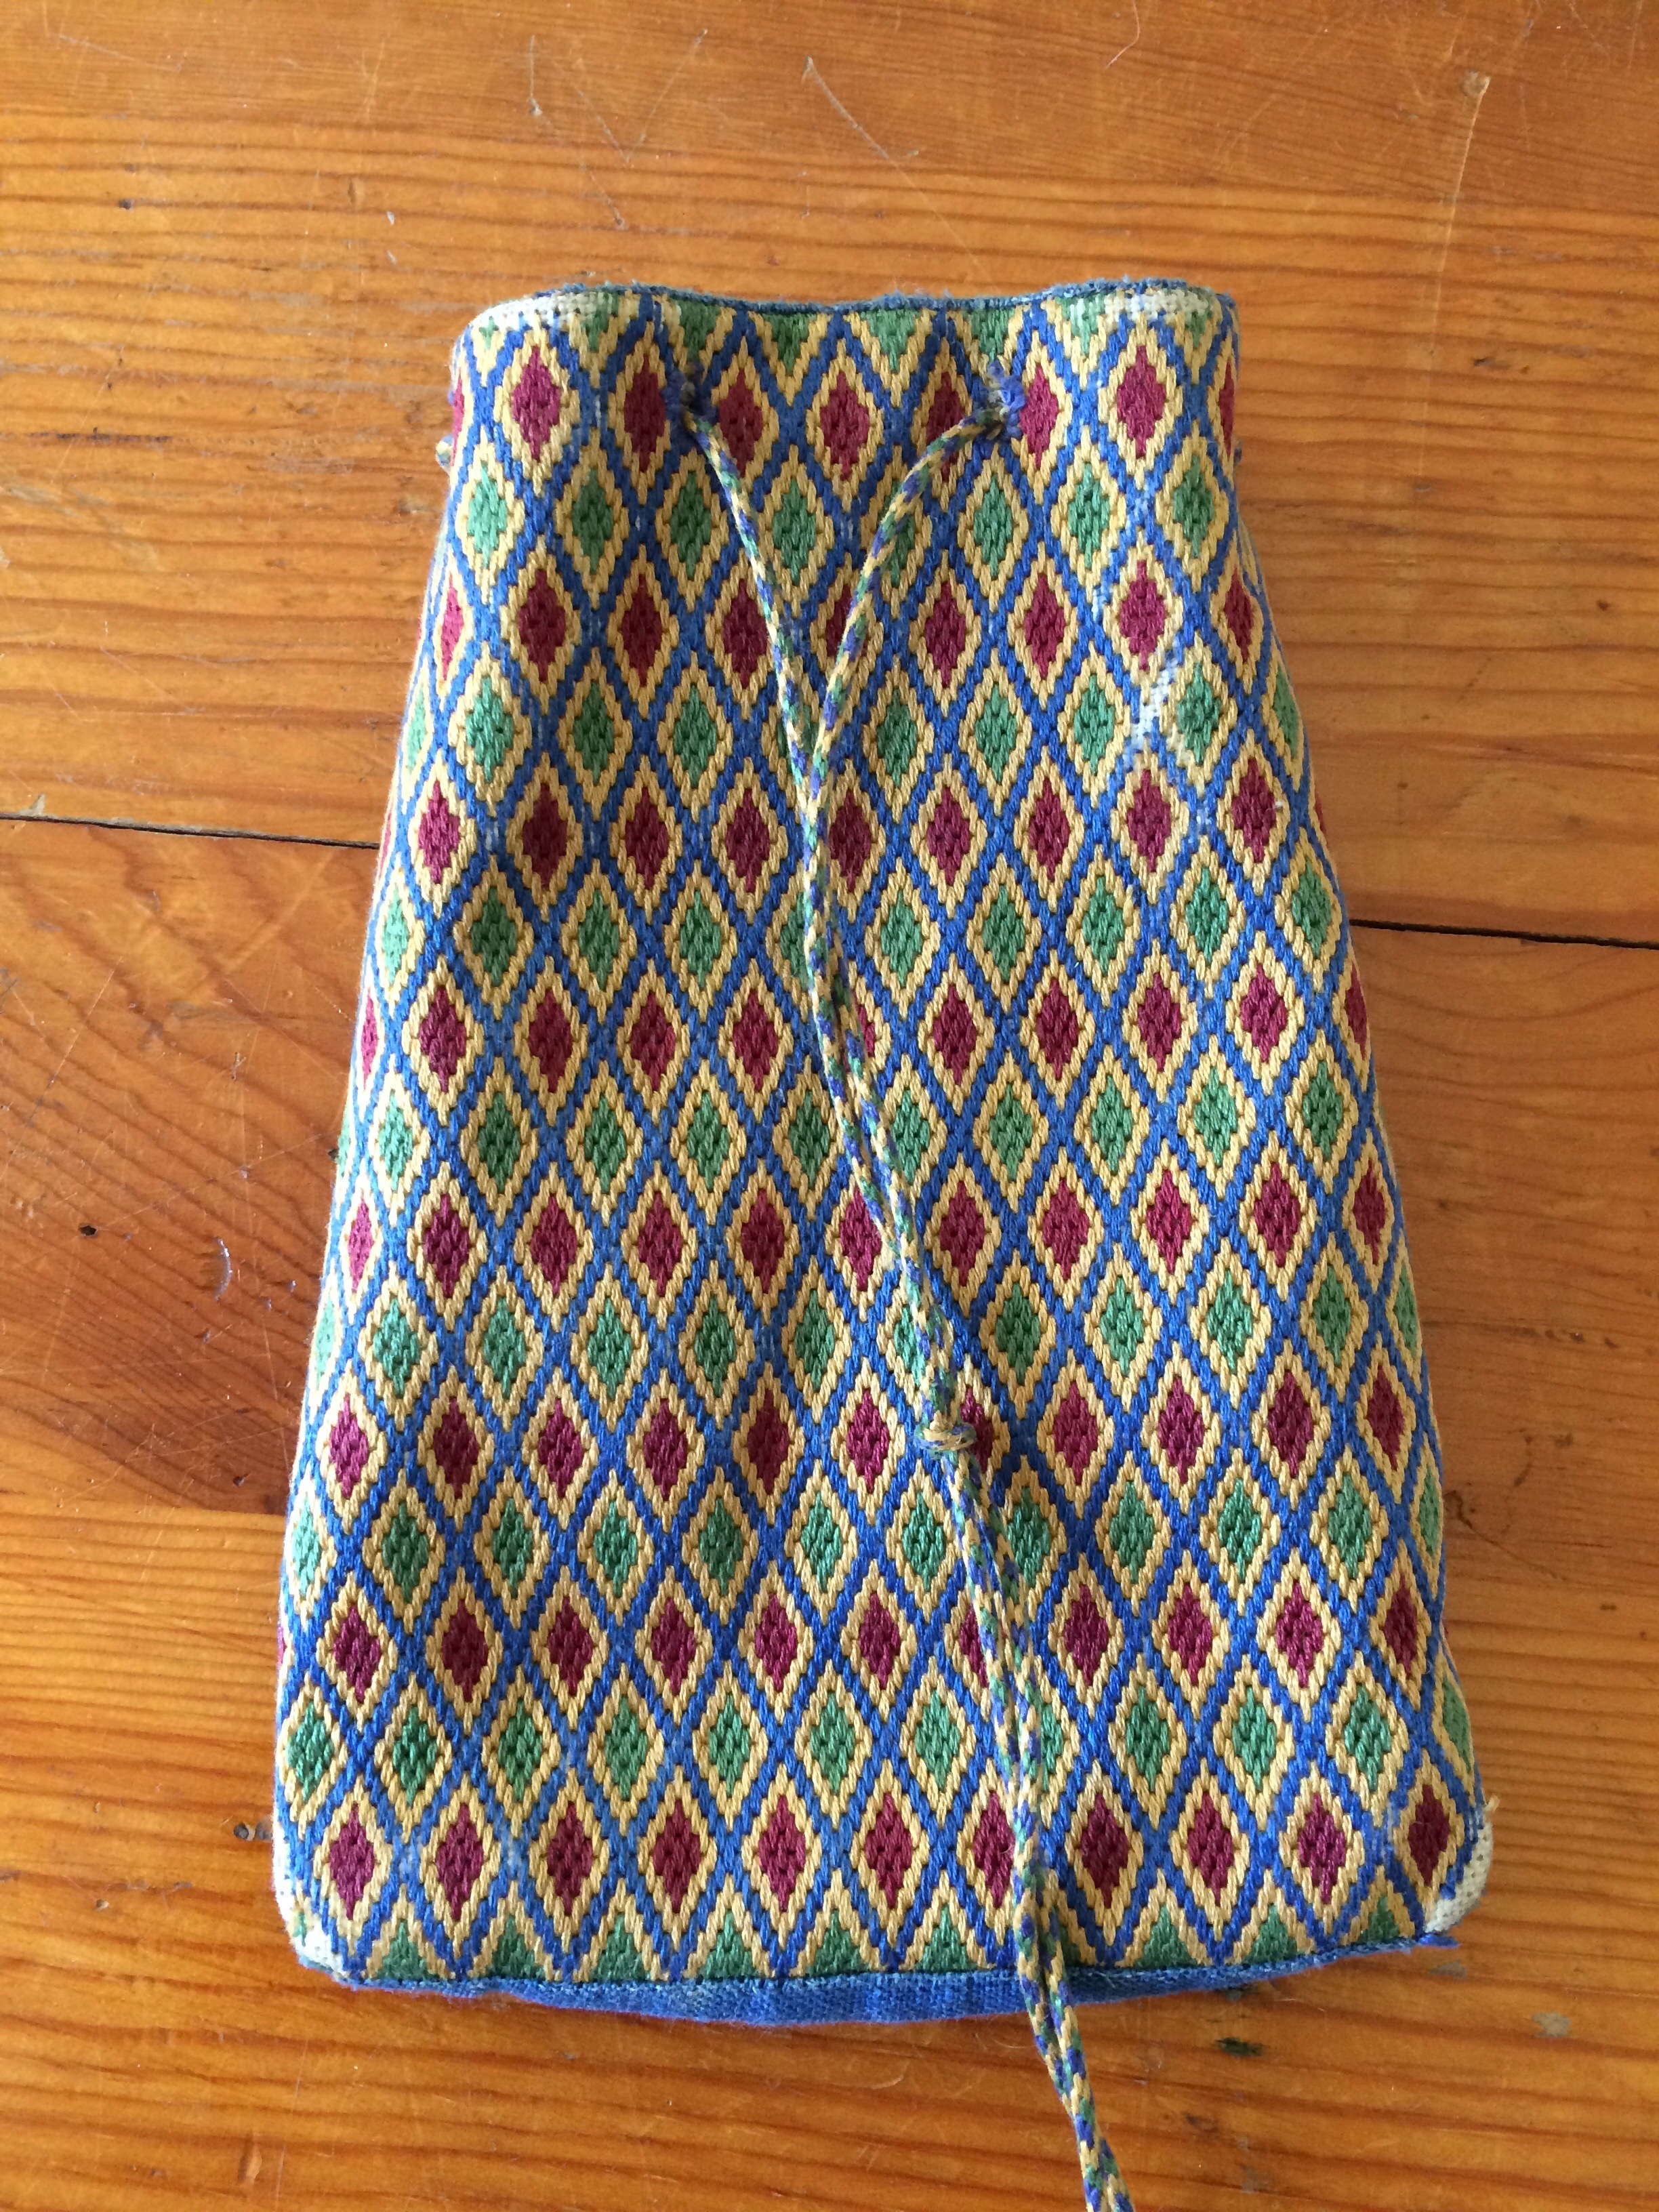
My first Brick Stitch pouch. Made in 2013. It gets a lot of use.